Urban Outfitters Inspired Room Makeover!
Where do I begin? First off, I don't usually get to participate in home/room makeovers of this intensity, but I am SO glad I did because I learned so much about what it takes to renovate plaster walls!
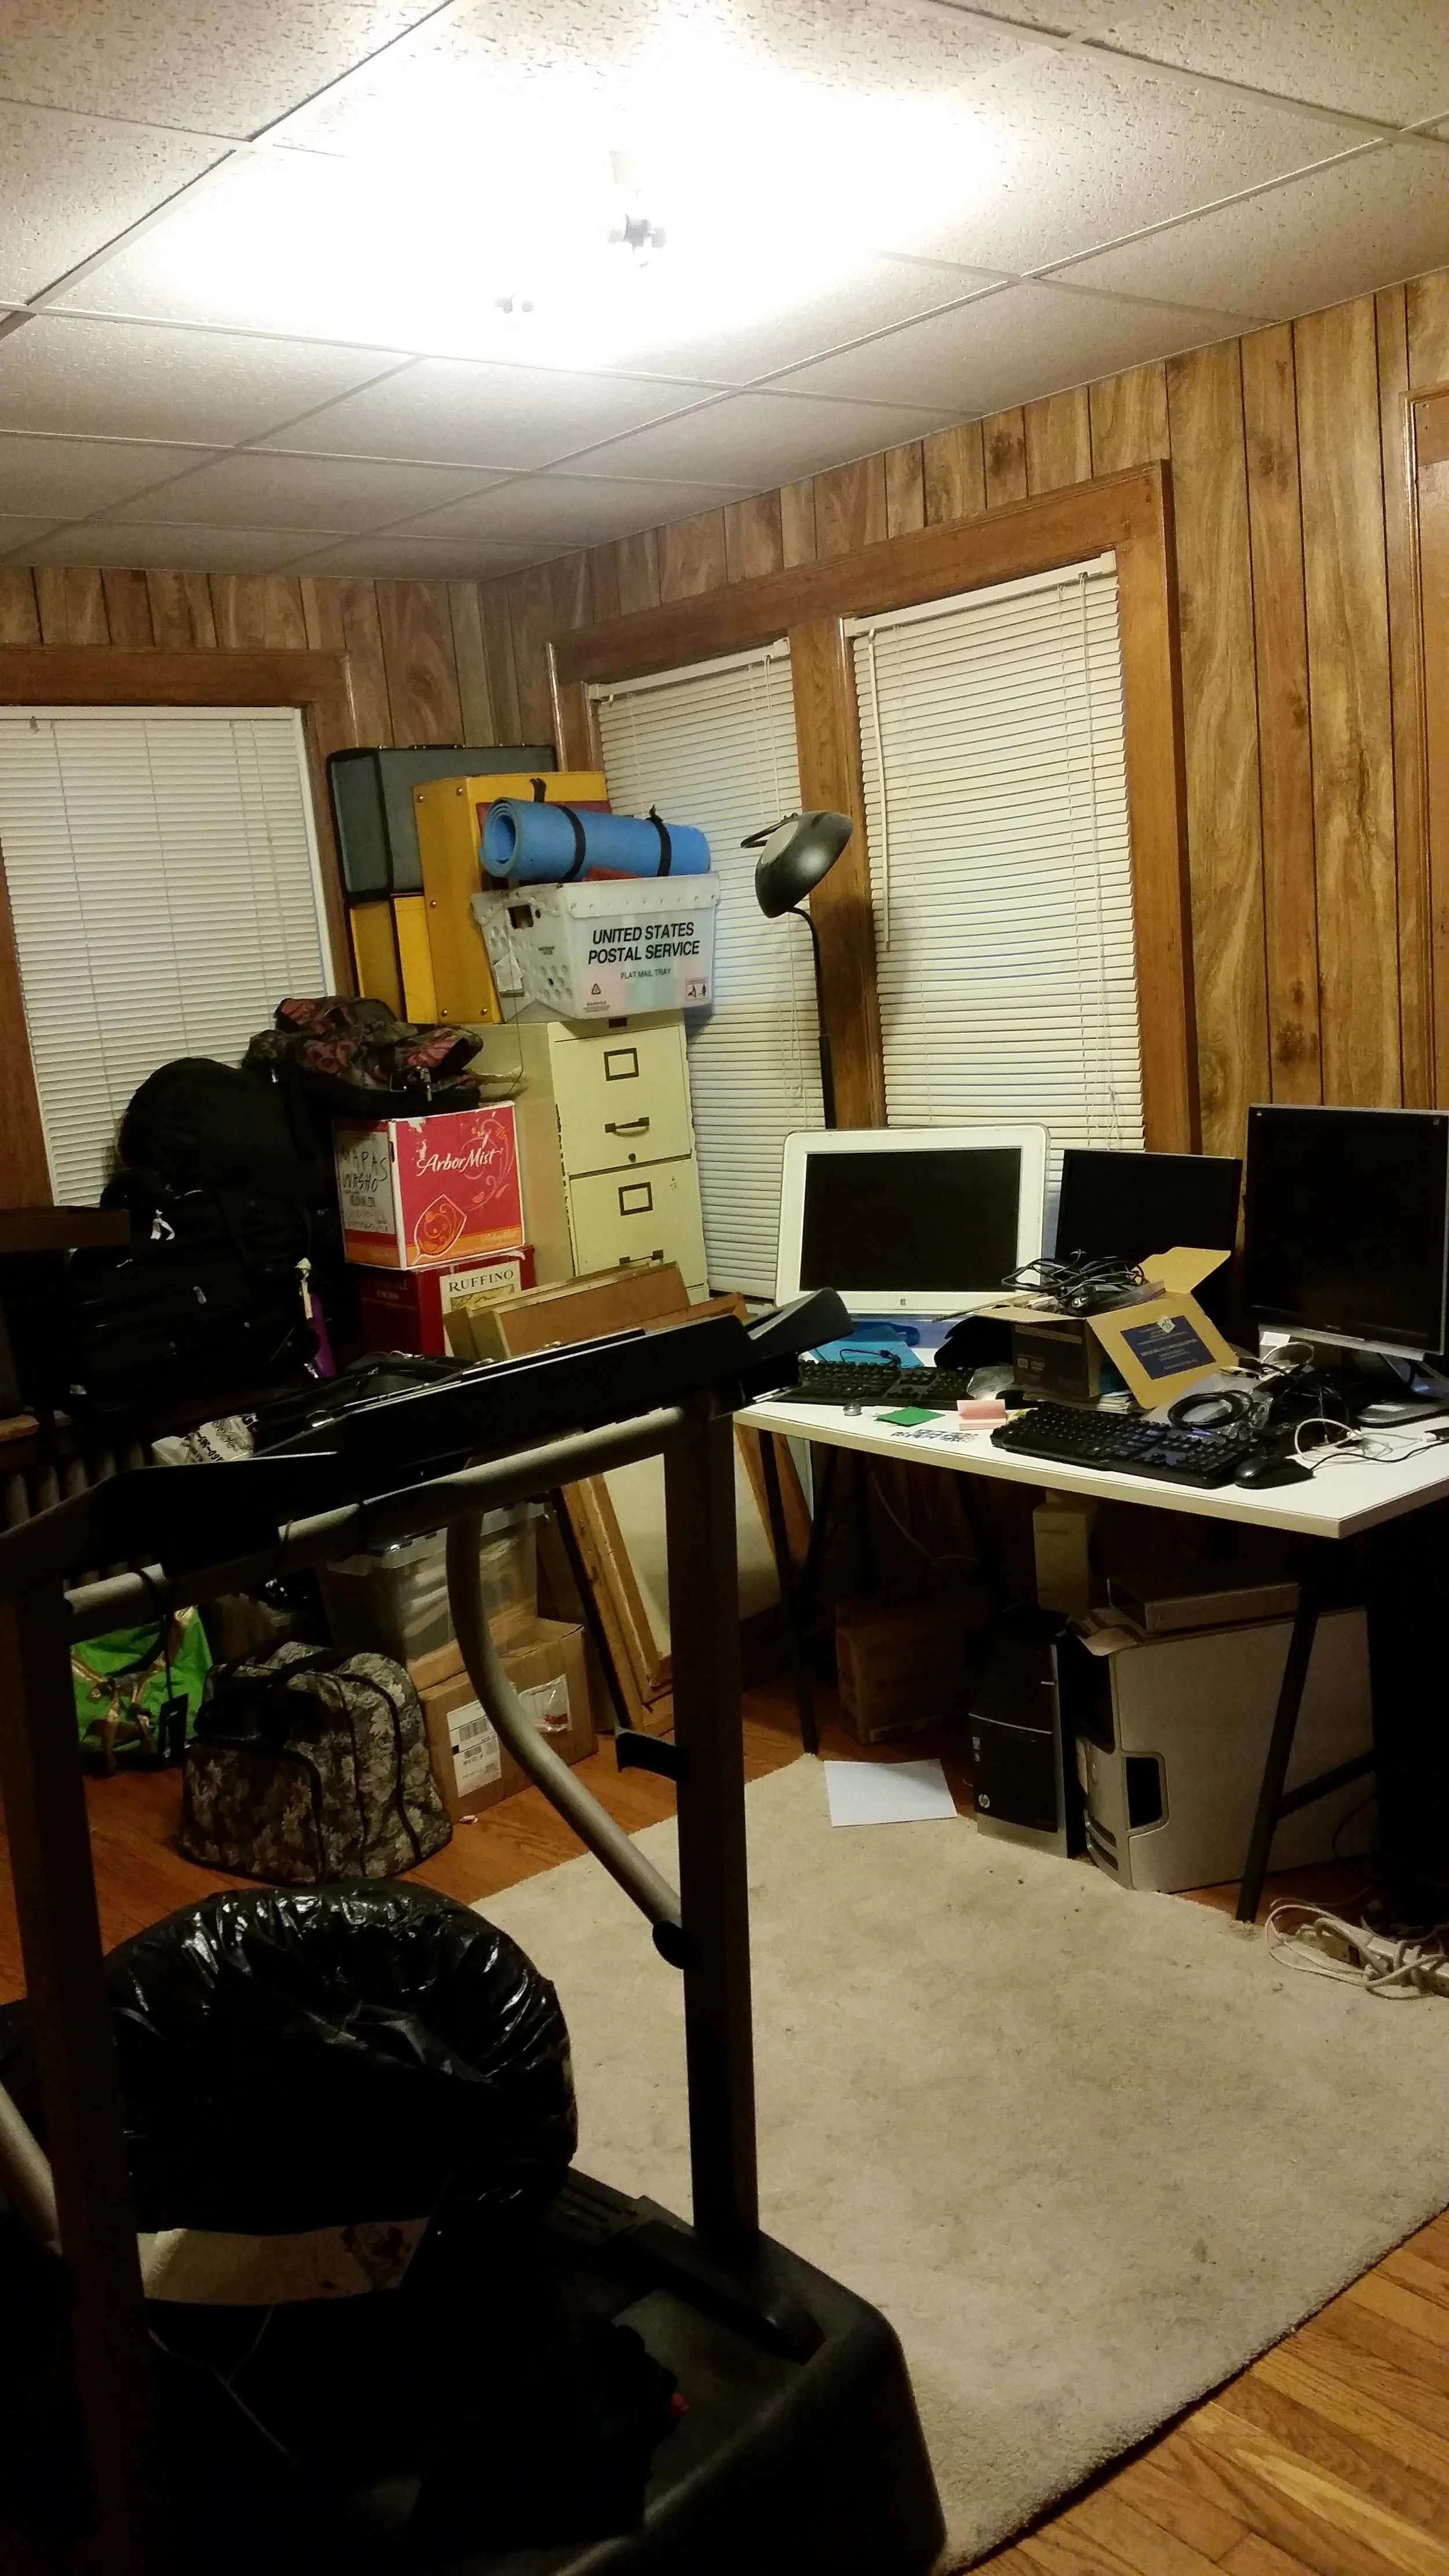
My mom and I were having one of those moments where we look around the house and brainstorm how we can we kick my Dad's slight hoarding problem out of a particular space and create an atmosphere that is welcoming and beautiful again. If any of you have a hoarding family member then you probably feel me on this struggle! (This photo is actually not that bad because mom usually tries to make sure it doesn't get out of hand).
We landed in the den room which had lots of potential because of the EIGHT WINDOWS it had! I love sunlight and this was going to be my new living space so I was really excited to envision the possibilities.
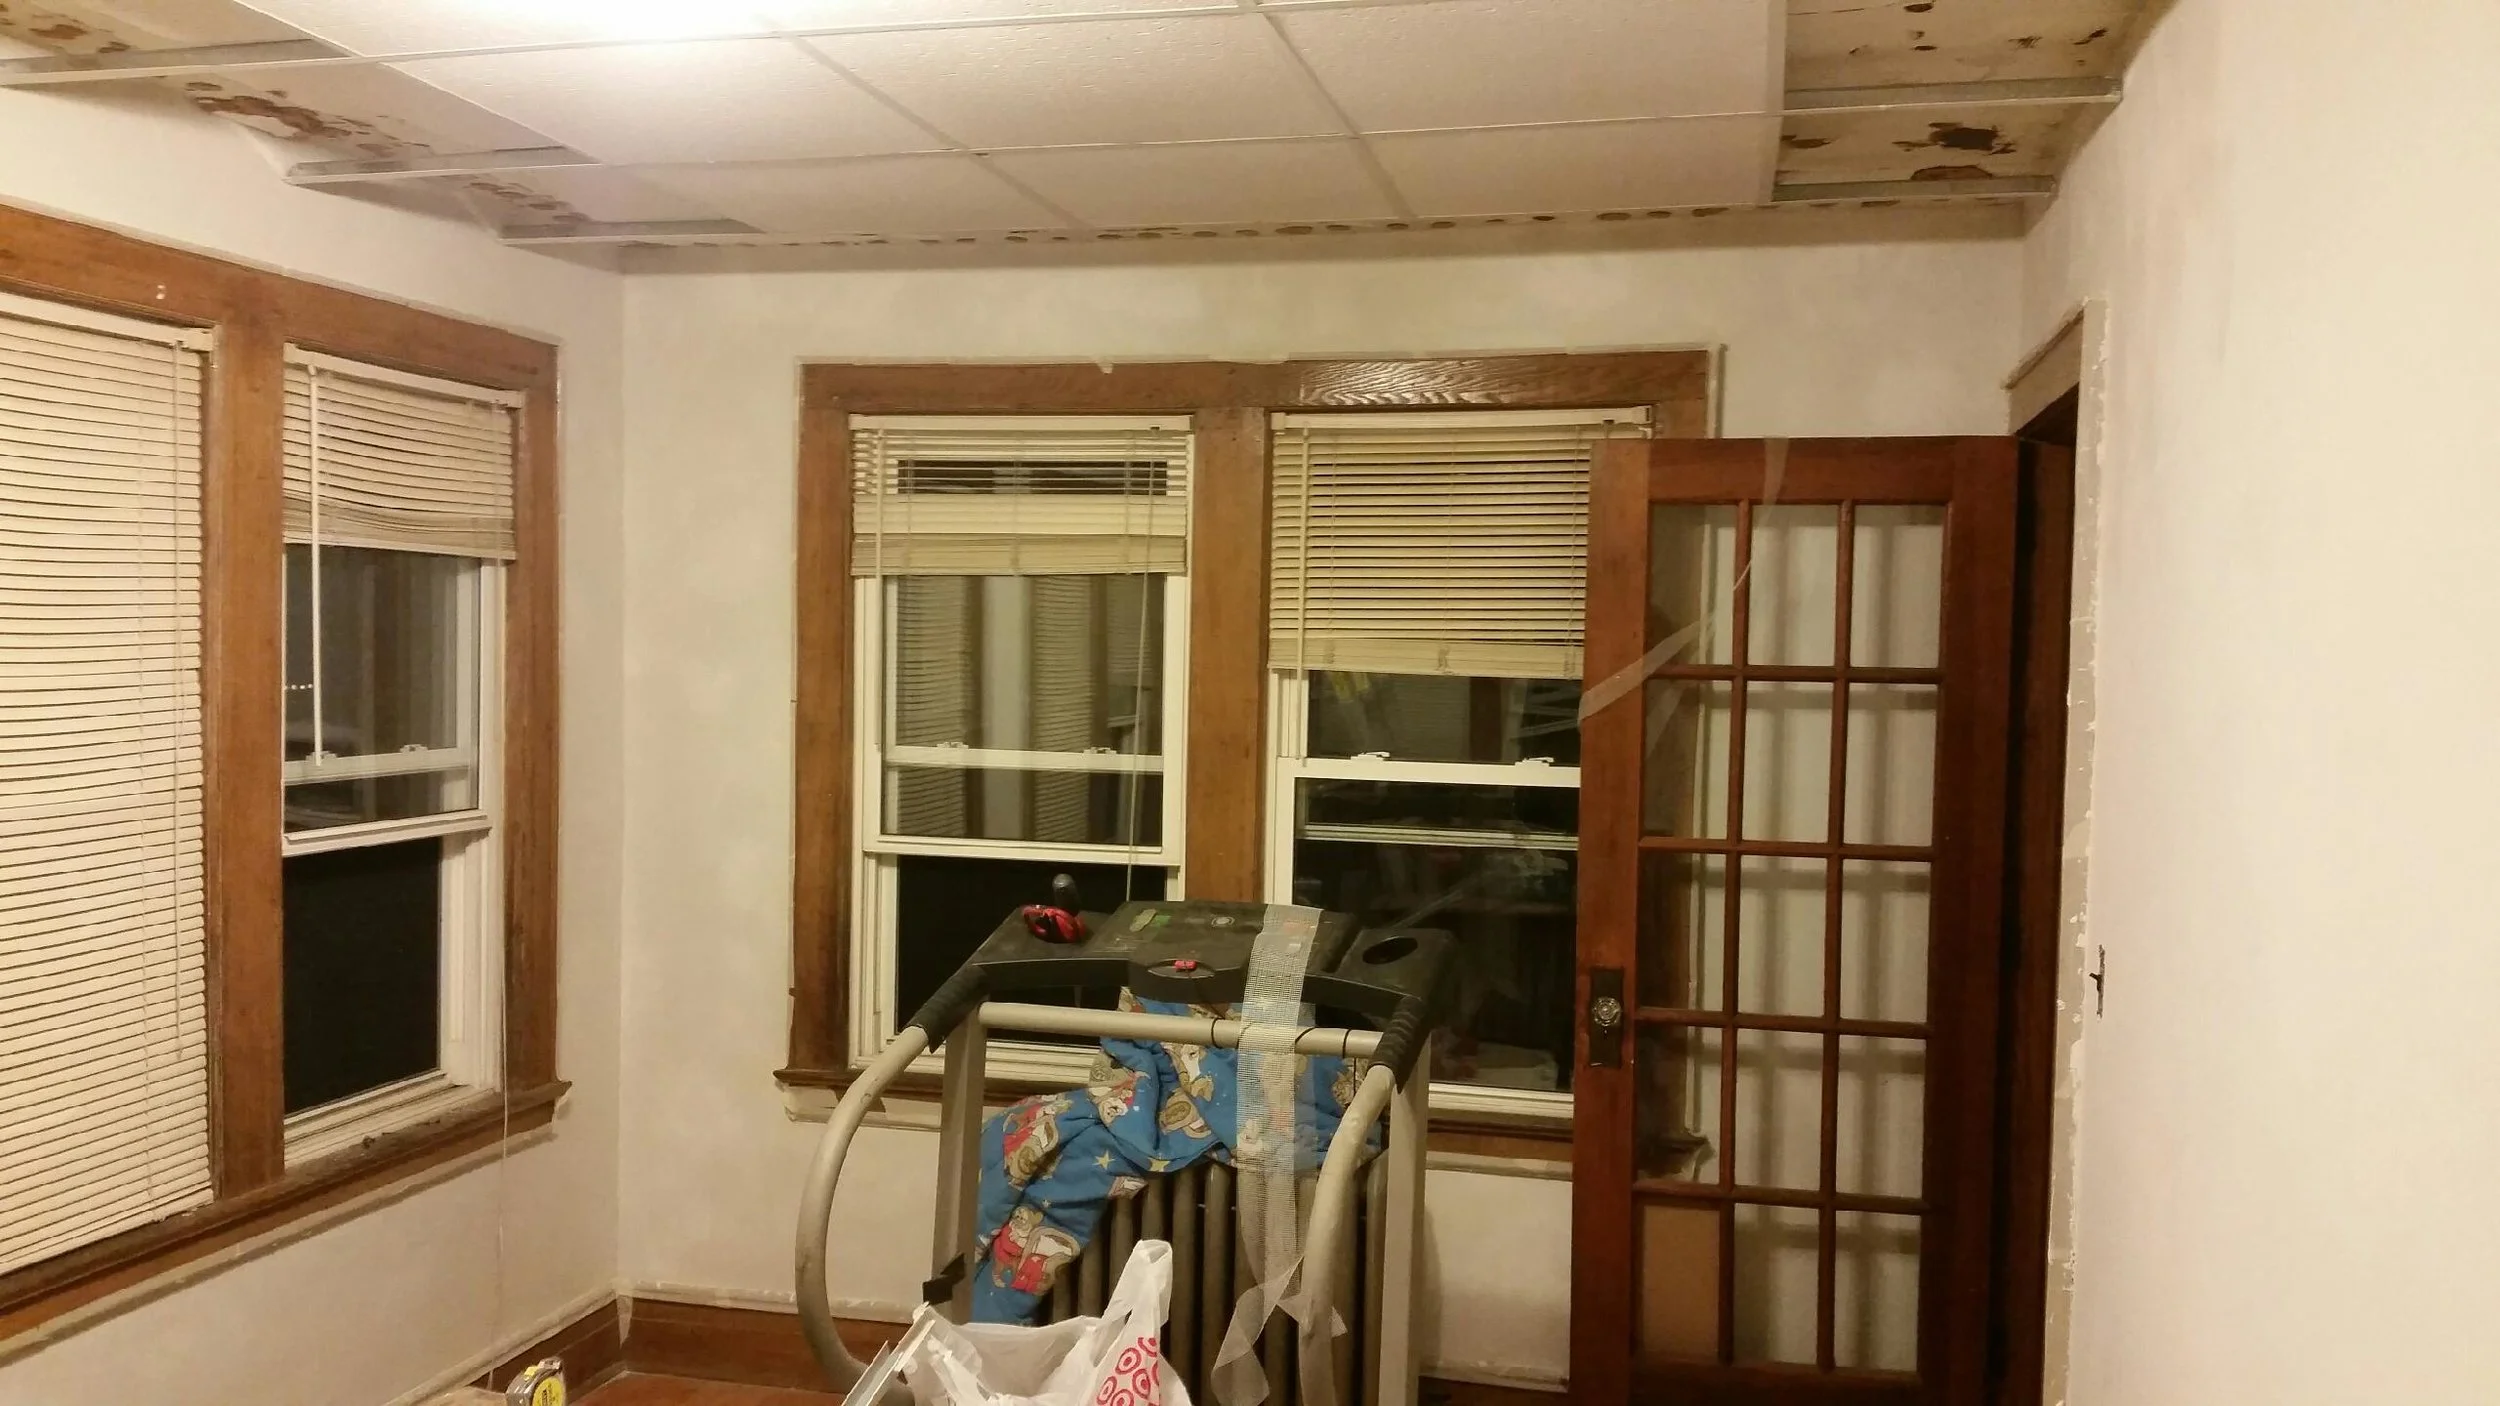
After purging the room of dad's things, the first order of business we were eager to get started on was to start ripping off those outdated, dark, and out of place wood panels (they didn't go with the white drop ceiling and I think it was the previous owner's easy way of dealing with the walls behind them...SIDE NOTE, we probably could've just painted them white...oh well!). We started ripping off panels before we even fully committed to that kind of a makeover and quickly realized these weren't sheetrock walls like you'd find in newer homes. These were plaster walls. The second we realized that we knew we were in for a real project and not just a simple spackle and paint job.

The walls had stubborn old paint that was super difficult to chip away and there were cracks and holes in them that revealed stones which made up the inside of the wall. There was even a section of the one windowless wall that had a much hollower sound when you knocked on it. We assumed there must've been a door there before.
In order to rip off all the wood panels we had to unscrew the drop ceiling one section at a time to prevent it from collapsing and after we finally ripped off all the panels we head to The Home Depot to buy our supplies.
Essential HOME DEPOT Supplies List for Plaster Wall Repair:
1. A bag of PLASTER OF PARIS.
2. A bucket of MIXED JOINT COMPOUND
3. A TAPING KNIFE, HAMMER-END JOINT KNIFE, INSIDE CORNER TOOL, and a MUD PAN.
4. A big roll of ADHESIVE DRYWALL MESH to lay over cracks and holes in the wall.
5. CAULK and CAULK GUN.
5. PAINTER'S TAPE


Anything we didn't buy from Home Depot we either already had or found a substitution that worked well. For example, we already had gloves, screw gun and screw set, a ladder and we used an old blanket instead of purchasing a drop cloth. You'll need all of these supplies when doing a makeover like this, but look around your house to see what you already have and what you can save on!
I think it took us at least 2 weeks with our busy schedules to finish this room. It was a ton of work! Ripping off the panels, unscrewing/rescrewing the drop down ceiling, chipping away old paint and residue to get a smooth wall, spackling holes, applying adhesive nets, mixing plaster of paris with compound and then applying two layers to the wall to get a thick/smooth finish (waiting both times for it to dry), sanding down the wall after it dried, wiping it down with a wet towel, and FINALLY getting to paint it the color SUPER WHITE by Benjamin Moore. I should also mention that I refurbished those heater covers by taking them outside for a good sanding and then painted them white to match the new vibe of the room! All of this required a decent amount of elbow grease. Notice that this list excluded decorating, which was a whole separate endeavor and probably requires its own post.
And NOW the finished product!

I'm really happy with the way the room turned out. It feels airy and WAY brighter than before. I'm also living for the majesty palm plant and the white curtains. Successful transformation in my opinion! Let me know in the comments what you like about it and what else I could add!